AE1/Thick Jungle: Difference between revisions
slope jump |
m infobox |
||
| (7 intermediate revisions by the same user not shown) | |||
| Line 1: | Line 1: | ||
{{infobox_level | |||
| level = Thick Jungle | |||
| image = File:ThickJungle-0.jpg | |||
| monkeys = 6/14 | |||
| specter_coins = 4 | |||
| new_gadgets = Monkey Radar | |||
| prev_level = [[AE1/Molten Lava|Molten Lava]] | |||
| next_level = [[AE1/Dark Ruins|Dark Ruins]] | |||
}} | |||
This level can be a pain thanks to the fabled UFO monkey and the second cocoon monkey can act up. | |||
== Radar Training == | |||
This one can be a bit tricky, the monkeys have 9 patterns they can be in. All monkeys being on one side is the pattern (all left/right). | |||
{| class="wikitable mw-collapsible mw-collapsed" | |||
|+Pictures of the patterns. | |||
(In order of fastest->slowest, estimated.) | |||
!Pattern | |||
!Image | |||
|- | |||
|'''#1 Fastest''' | |||
|[[File:Ae1-radar-p3.png|300x300px]] | |||
|- | |||
|'''#2''' | |||
|[[File:Ae1-radar-p7.png|300x300px]] | |||
|- | |||
|#3 | |||
|[[File:Ae1-radar-p1.png|300x300px]] | |||
|- | |||
|#4 | |||
|[[File:Ae1-radar-p5.png|300x300px]] | |||
|- | |||
|#5 | |||
|[[File:Ae1-radar-p8.png|300x300px]] | |||
|- | |||
|#6 | |||
|[[File:Ae1-radar-p2.png|300x300px]] | |||
|- | |||
|#7 | |||
|[[File:Ae1-radar-p6.png|300x300px]] | |||
|- | |||
|#8 | |||
|[[File:Ae1-radar-p4.png|300x300px]] | |||
|- | |||
|#9 | |||
|Image missing :P | |||
|} | |||
== Any% / Any% No IJ == | == Any% / Any% No IJ == | ||
talk about the any% no ij route and tricks. | talk about the any% no ij route and tricks. | ||
| Line 11: | Line 60: | ||
=== Slope Jump === | === Slope Jump === | ||
After the UFO monkey you can get up onto the ledge with a simple slope jump. | After the UFO monkey you can get up onto the ledge behind him with a simple slope jump. | ||
Go into the left corner and run up the slope for a bit and then double jump to the right | Go into the left corner and run up the slope for a bit and then double jump to the right. | ||
More optimally you can do an [[AE1/tricks#Slope Jumps|Advanced Slope Jump]] which is harder but allows you to skip the ledge grab for a small time save. | |||
[[File:AE1Leftslope.gif|none|frame|Left Side (Easiest Method)]] | |||
There is also the harder right side slope jump, which is | There is also the harder right side slope jump, which is a tiny bit faster but way cooler. | ||
Instead of the left corner, go to the right corner. | Instead of the left corner, go to the right corner. | ||
Here you want to run towards the slope and aim to the left of the patch of grass on | Here you want to run towards the slope and aim to the left of the patch of grass on the wall. | ||
This requires the "Advanced Slope Jump" so: right before you hit the slope you want to let your left stick go neutral and jump quickly after, you will fly up the slope in a standing pose. | |||
From | From the standig pose, simply double jump to the left to get on the ledge. | ||
[[File:AE1Rightslope.gif|none|thumb|349x349px|Right Side]] | |||
Latest revision as of 11:17, 28 August 2025
| Monkeys | 6/14 |
|---|---|
| Specter Coins | 4 |
| New Gadgets | Monkey Radar |
| Previous Level | Molten Lava |
| Next Level | Dark Ruins |
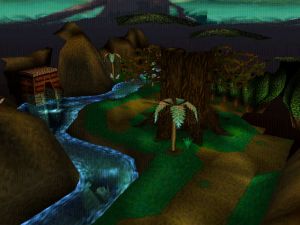
This level can be a pain thanks to the fabled UFO monkey and the second cocoon monkey can act up.
Radar Training
This one can be a bit tricky, the monkeys have 9 patterns they can be in. All monkeys being on one side is the pattern (all left/right).
| Pattern | Image |
|---|---|
| #1 Fastest | 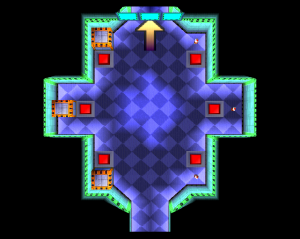
|
| #2 | 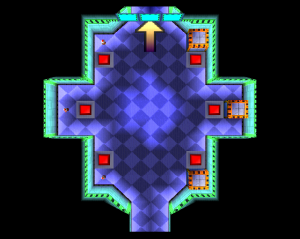
|
| #3 | 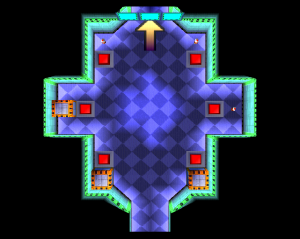
|
| #4 | 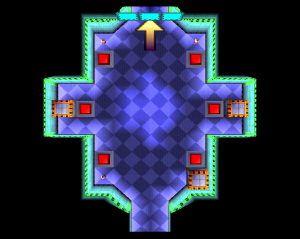
|
| #5 | 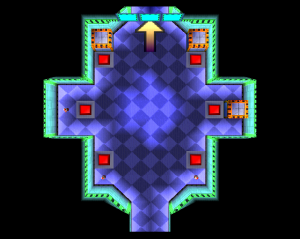
|
| #6 | 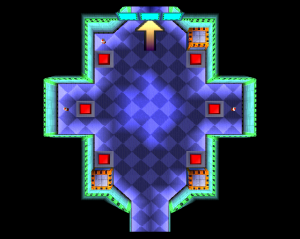
|
| #7 | 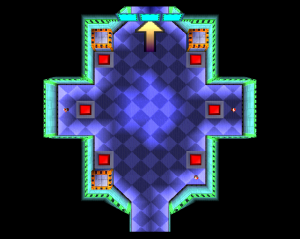
|
| #8 | 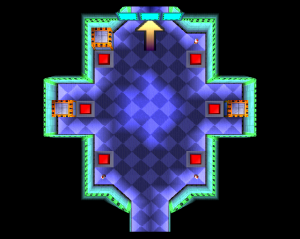
|
| #9 | Image missing :P |
Any% / Any% No IJ
talk about the any% no ij route and tricks.
All Monkeys
talk about the all monks route and tricks.
Tricks
UFOless
todo: write something smart.
Slope Jump
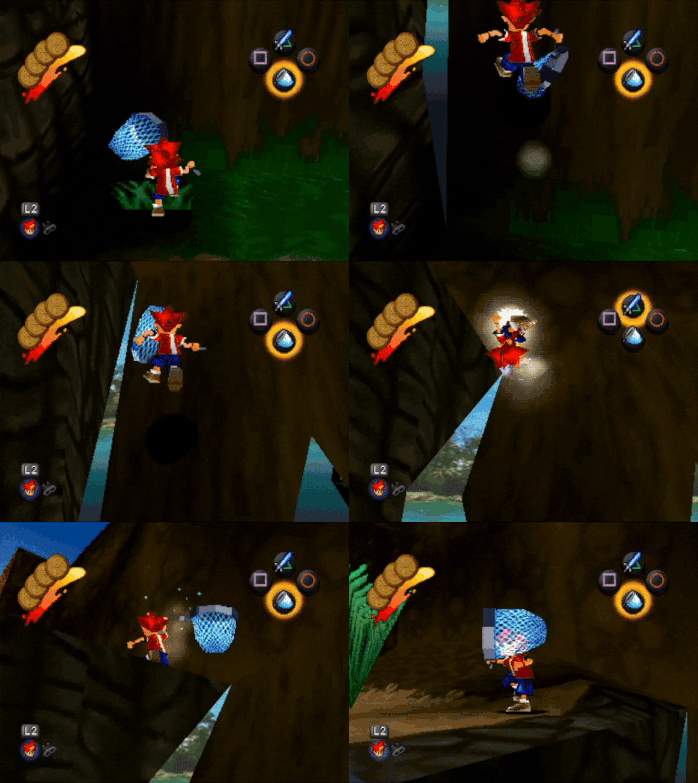
After the UFO monkey you can get up onto the ledge behind him with a simple slope jump.
Go into the left corner and run up the slope for a bit and then double jump to the right.
More optimally you can do an Advanced Slope Jump which is harder but allows you to skip the ledge grab for a small time save.
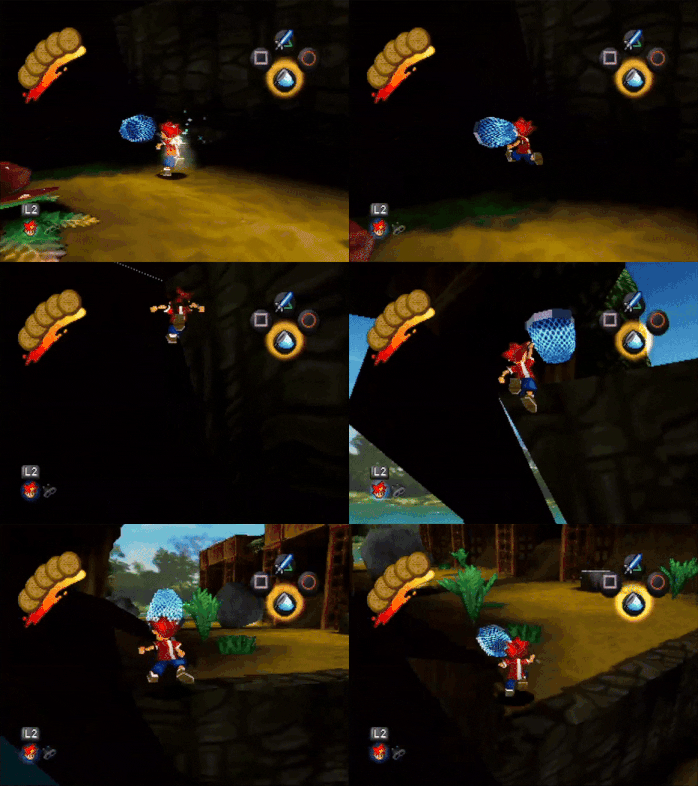
There is also the harder right side slope jump, which is a tiny bit faster but way cooler.
Instead of the left corner, go to the right corner.
Here you want to run towards the slope and aim to the left of the patch of grass on the wall.
This requires the "Advanced Slope Jump" so: right before you hit the slope you want to let your left stick go neutral and jump quickly after, you will fly up the slope in a standing pose.
From the standig pose, simply double jump to the left to get on the ledge.
